
Can Tiles be Painted?
Yes, tiles can be painted. This is a conditional statement dependent on the type of area and environment of the existing tile. Paint can easily wear off in areas that are prone to moisture and are high in traffic. They will not last longer than you expect them to be if they are located in areas that tap both conditions. Ceramic tiles are the type that can withstand paint coverage. Even though they come compatible, we still highly recommend having the tiles prepped prior to painting. We understand how much you want to transform the look of the tiles thus we have rounded up steps on how to.
Step 1: Cleaning the Surface
The first step in painting the tiles is ensuring that each one is clean. We highly recommend using TSP or grime-busting trisodium phosphate cleaner that often comes in powdered form. It is then mixed in water to activate its strength as a cleaning agent. They work well in leaving each tile spotless and free from soot, grease, and oils. It is suggested to be used with heavy-duty gloves, pants, shoes, and long sleeves because it can be harmful without proper skin protection. Its strong smell can also cause harm. Thus, the need for a mask and excellent ventilation.
The ratio of the cleaning liquid is ½:1. You will be needing half a cup of the TSP powder mixed in a gallon of water. The more concentrated the mixture is, the stronger it is going to be. Scrub the surface continuously and evenly. It would be best to soak the tiles first for five to ten minutes before starting to scrub. Scrub the tiles in a circular motion to cover every area. Once you are ready to wash, use warm water to free the tiles from the mixture. Use a dry rag to wipe the surface and free them from an excessive amount of moisture. You can expose the tiles to natural ventilation or use an electric fan to dry the surface completely.
Step 2: Sanding the Tiles
The second and most important step of painting the tiles is sanding the surface. We highly recommend using fine-grit sandpaper. This will serve as an aid in alleviating the glossy finishes of the tile that often causes the paint not to last. Ensure that you are painting a rough surface free from gloss. To dust off the tiles, use a rather wet cloth to remove the dust from the sanding. This is an important step prior to having the tiles primed.
Painting over dusty tiles will just put the primer and paint to waste. Pat the tiles multiple times with a wet cloth to ensure that each one is free from dust. You can also use a brush to dig into the core of the tiles to make it easier to eliminate excess dust. Do not aggressively sand the surface to the point that there is already unevenness in the tiles. Instead, enough to remove the glossy coating.
Step 3: Coating with Primer
The third step is where the aesthetic value of the tiles is dependent. It is a critical step that is often overlooked by some and eventually jumps into the step of painting the tiles. We highly encourage the use of a high-adhesion primer. This will help in managing the texture of the tiles and concealing any unwanted discolorations.
High-adhesion primers are ought to create a surface that makes a layer of paint look even because of its chemical composition. This helps in the paint easily wearing off within a short amount of time. It may come as an addition to the cost but it is worth every penny spent. Be selective on the type and brand of primer to use.
Instead of using a brush, priming the tiles with a roller will help in evenly distributing the product and prevent an uneven coverage or buildup. You can see how much it makes a difference once the surfaces are painted. Prior to the application of paint, it would serve the tiles best to allow them to completely dry.
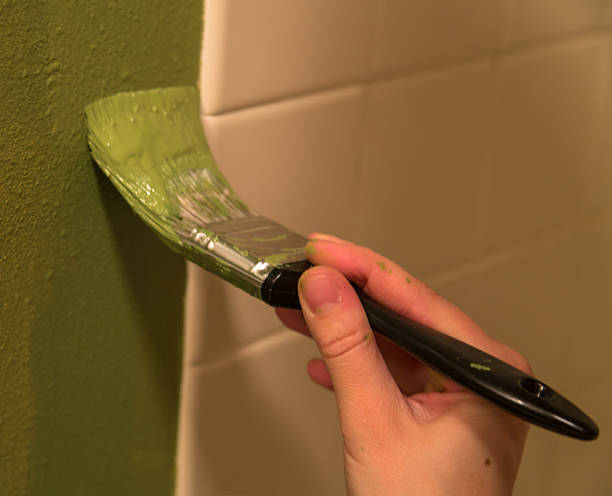
Step 4: Painting the Tiles
Once the primed tiles are completely dried, use a brush to eliminate excess dust prior to painting. Painting is the most exciting part of the job since most of the dirty work has already been done. When it comes to the tiles, we highly recommend the use of acrylic latex, latex, and enamel paint. They are ought to last longer in tiles when prepped carefully.
The surface is now textured yet still even enough to walk on to. Depending on the transparency of paint you prefer, two to three coats of paint would suffice to ensure that the coverage is even. It is important to know that painting tiles are not the same as painting the walls. We encourage adding the coat necessary to find the flooring comfortable to walk on.
If you have a pattern in mind for the floors, it would be best to stick the stencil to the tiles. This will serve as a guide to prevent having paint in places it should not be. Since the tiles are already textured, it can be difficult to stick the textile to the tiles. Thus, the use of additional adhesive is necessary. Do not remove the stencils not unless the painted surface is given time to completely dry.
Step 5: Finishing with Top Coat
Not all are a fan of using topcoats to finish the painting job of the floors. They are formulated for you to achieve your ideal appearance in terms of structure, color, and gloss. Considering that we are painting an unusual surface, using a topcoat is important to have a protective layer. This ensures that the paint will last longer than you expect it to be. They are usually rolled or sprayed on the surface in a transparent or clear coating. Topcoat comes in matte forms too for those who are not a fan of a glossy finish.