
How to Display Family Photos in the Living Room?
Our living room is the designated area for receiving guests in our home. It gives a preview of the rest of the house and a glimpse into the story of our lives. Beyond its functional space, this area serves as a conversation starter.
There’s no better storyteller than family photographs in the living room. It captures your highlights and random moments depicting your beautiful constants in life. These personal touches exude warmth in your home and provide an instant connection to your visitors. While some may see it as sentimental, placed tastefully, your family snapshots can be works of art in the living room.
When it comes to incorporating family pictures in your design, presentation is a tall order. So if you’re decorating with your treasured images and don’t know where to start, here are some tips on how to display family photos in the living room:
Pick the Right Spot
Before you start boring holes, look at the exposed spaces in the living room area. Scan your surroundings from your couch, tables, lamps, plants, entertainment unit, fireplace, and walls. From there, determine the space available to you and choose the area that will make the most impact.
To help you go through your options, here are the different areas where you can position your family pics:
Mount on the Wall
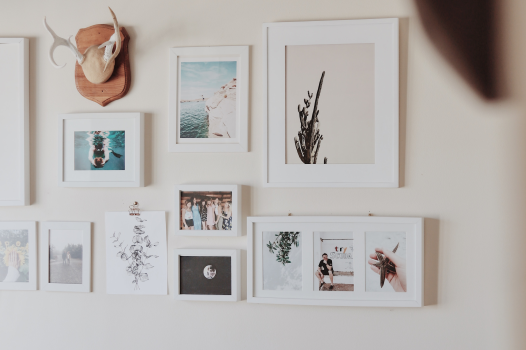
The most obvious place to put your family portraits on display is on a bare wall. This turns any blank space into an accent wall.
When decorating, it’s not advisable to fill up adjacent walls with pictures. You can instead place a decorative shelf beside your gallery photos or leave it empty. It’s equally important to allocate areas where the eyes can rest which will even highlight your portraits on display.
If not a full wall, check for a narrow wall space on the corners where you can place small framed photographs or hang dangling frames for more style.
Hang Above Your Furniture

A popular option is to make use of the space above your furniture. Here are some key things to consider:
- If you have a long couch or a sectional at home, break the linear look with an assortment of frames and photo sizes.
- With large windows behind a couch, affix picture frames on the walls between the windows or on the sides.
- If you have side tables, consider mounting photos above that area.
- Remember not to put too many pictures that extend beyond the width of the furniture.
Position Around the TV
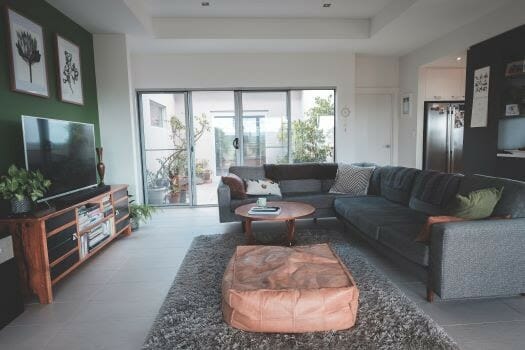
When putting family pictures around the tv, make sure it’s there for decoration and not a distraction.
Whether your TV is on a stand or mounted on the wall, read our tips to know how to position your family photos around it:
- The TV is the focal point so pictures are ideally smaller. Avoid flashy frames that could bother you when watching.
- You can position an equal number of small photos on each side. You can also choose to place your photos above the television. Best not to go beyond the width of the TV.
- If you want to place pictures above and on the sides, make sure it’s all aligned. We recommend using a simple frame like a black border to blend in.
Photos Above the Fireplace
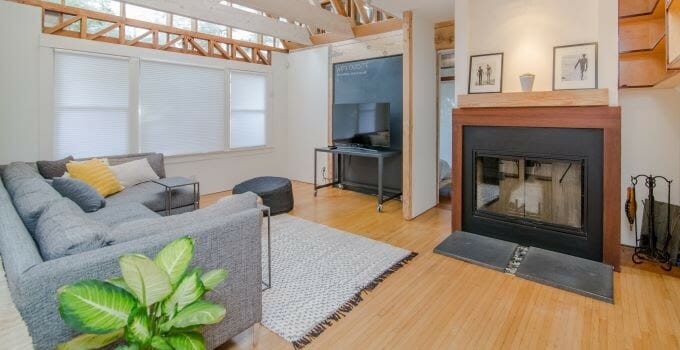
This is probably one of the coziest places to display your portraits when you’re warming yourself while looking at your photos, major nostalgia coming up!
Where to display your favorite photos? You could place it on the wall above the mantel. If you have a favorite photo or many small ones, display it within the same length of the fireplace opening. If you have a sizable fireplace, use the wall space on both sides for more memories on display.
Try a Wall Ledge
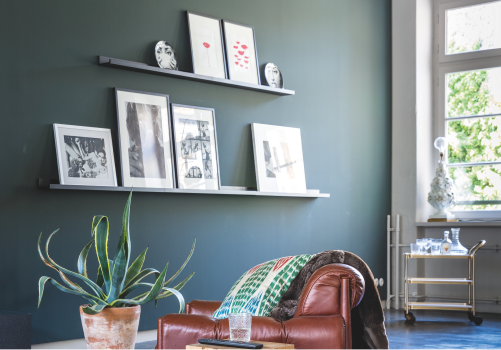
Don’t limit yourself to hanging pictures and gallery walls. Instead of hooks, opt to install a ledge on your living room walls as a base for the framed portraits. This is great for smaller picture frames or a big frame with collaged pictures. It’s flexible and you can change your pictures anytime.
On a Shelf or a Table
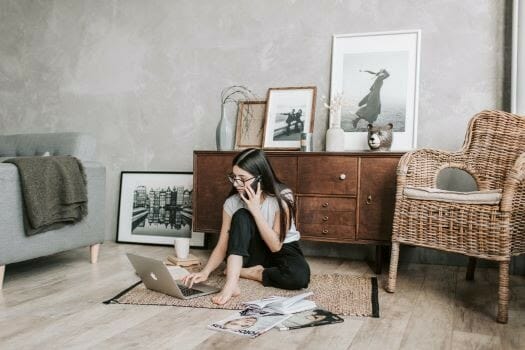
If you have a shelf in the living room, style it with family pictures and add keepsakes from family trips like a sand bottle or shell from your beach vacation. Feel free to add a few frames to your side tables for a subtle touch of memorabilia.
How to Display Family Photos?
Treating your photos as artwork will help you showcase your family memorabilia into wall art that coordinates with the interior design of your home.
Once you have selected the area in your living room, you can start curating your family photos for display. Depending on the space you have, plan the arrangement of your framed pictures, putting into consideration the number of photos you’ll need and the sizes of those images. Complement the design style of the room with the frames and mats you will be using in terms of color and texture. Put everything in place by making sure everything is aligned, achieving a photo wall you’ll be proud to display.
To help you achieve that hominess brought by your family portrait in your living room, here are three easy steps in displaying your family photos:
1. Plan Your Arrangement
How many photos you should post depends on how much space you have. There can be a tendency to fill up a whole wall which can be a little too much. At the same time, a blank wall with not enough photographs can look unfinished.
One Big Photo
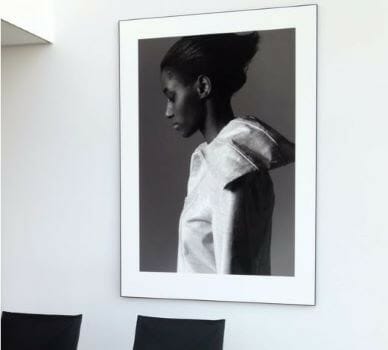
Some people like to go big. If you have a favorite family picture or portrait then hanging one big photo in your living room is perfect for you. This sizable display is also a great choice when you have a panoramic view in the background. You can go for one big image or divide the same photo into two or three side-by-side frames.
Grid Photo Wall
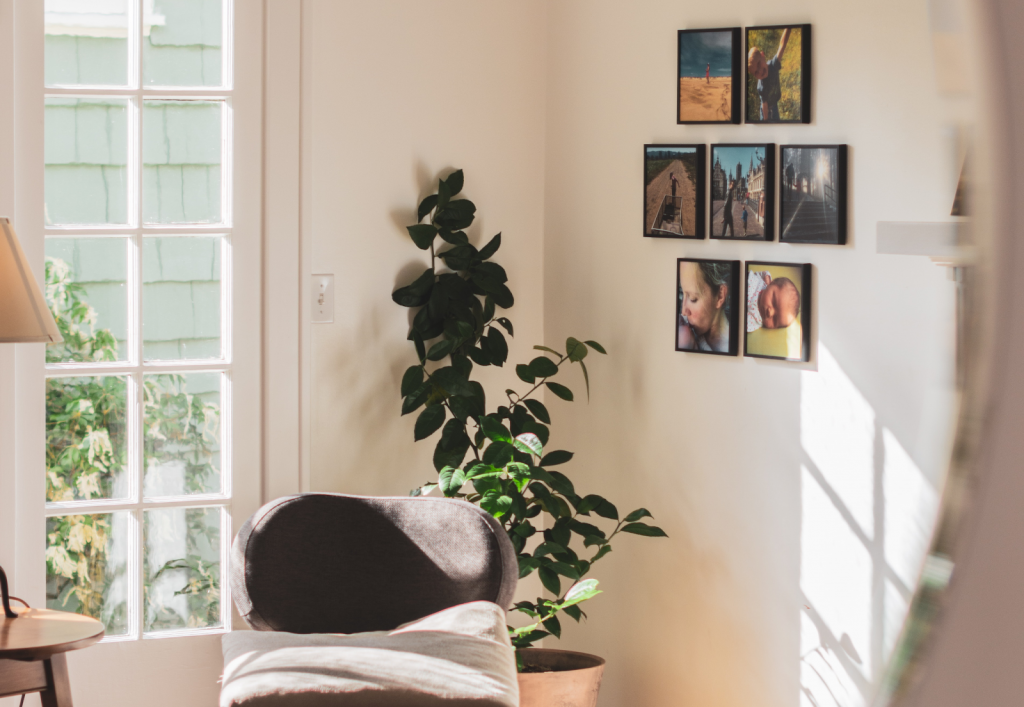
This is not as plain as an equal number of boxes as there’s a lot of style potential to a grid photo wall. You can put anywhere from four to twelve photos depending on your wall size. The frames may be square or rectangular frames which you can mount vertically or horizontally.
To add depth to your wall art, mix the sizes of the photos by combining close-ups and distant shots. Be particular in spacing your frames, don’t put them too far apart that it will lose the grid effect. If you have the space, you can also put a floor-to-ceiling grid, just make sure you can still appreciate the pictures at the bottom.
Contemporary Gallery Wall or Salon Hang
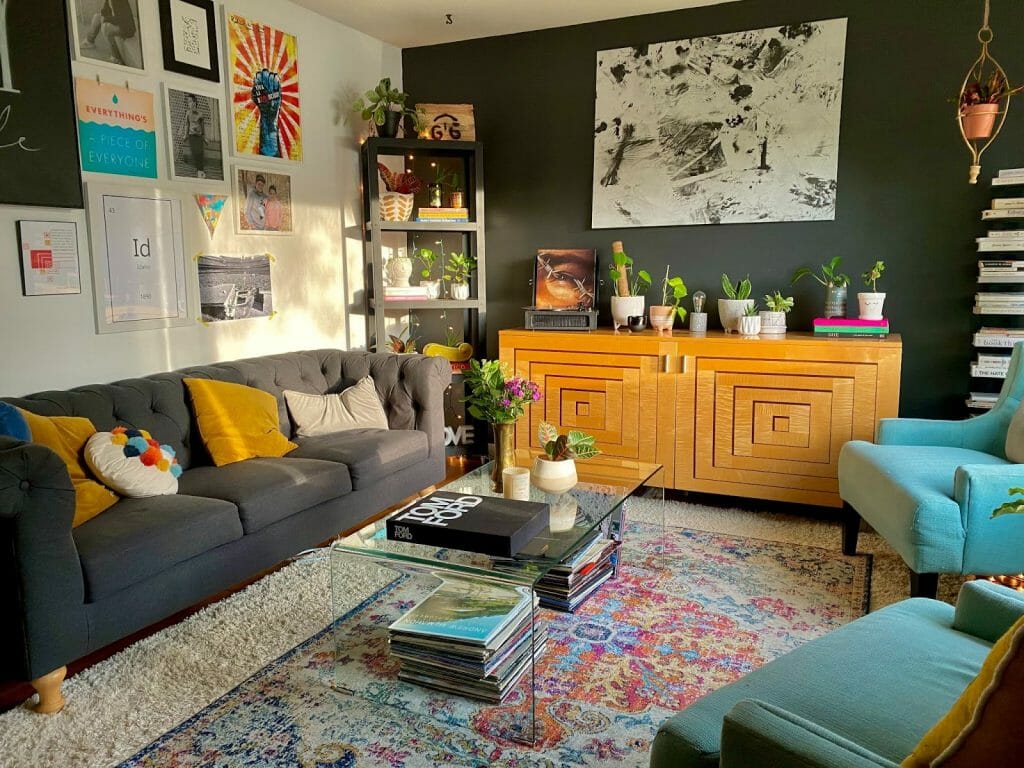
If you don’t want it as clean as a grid, hang it as a gallery wall with different shapes and sizes. It can be styled with protruding frames on the edges so you are free to add pieces in the future.
The overall look is visually appealing with the varying heights and widths of the frames. Try to put three to four picture frame styles and play with the sizes. If you have one large picture, you can add two to three small frames around it. If you decide to put two big photos, add four to six smaller frames around it. There’s really no exact measurement, but do try to have even space around the frames.
To add more personality, try the Salon Hang gallery design inspired by the 19th-century style of squeezing artworks in one wall. The Salon Hang is a curated arrangement of different photos, frame sizes, and colors that becomes a vibrant wall decor. It looks hodgepodge yet organized bringing a lot of character to your blank wall. You can also add quotations, a letter, or just about anything to personalize it.
2. Complement the Design with your Living Room
Your framed pictures must blend and connect with the rest of the living room’s decor so it doesn’t look like an afterthought. For example, for a country-themed interior, you can use wooden frames to identify with the style. Mediterranean design entails pieces that are a blend of earthy and bright colors. An industrial look can be matched with copper-tone accents. Find similarities in color and texture to provide continuity.
As you curate the pieces for your family photo wall, here are your options so you can come up with the final look that will bring out the best in your living room:
Choosing Your Theme
You can present your photos in chronological order by showing timelines or family growth. Your theme can also be travel, based on places you’ve been to as a family. Choose your favorite photos from one trip or take one photo from each memorable destination you’ve been to. You can also choose to post milestone celebrations like a wedding. It’s also perfectly fine to go with some random candid moments caught on camera that best depicts your family life.
Choosing Your Photos
When choosing multiple colored photos, try to achieve a cohesive look with consistent lighting. If there’s one picture that looks darker than others, it might stand out unsuitably in an otherwise balanced collection.
If your living room has an accent wall, black and white photos will provide an appealing contrast. This is also a great option if you want to hide the graininess of your photo. If you’re feeling experimental, try alternating black and white photos with colored ones.
Choosing Your Frames
Sometimes there’s one perfect frame that complements your living room design and it’s best to stick with it. Using matching frames can make your family photo wall look polished and cohesive.
You can also alter the visual appeal by using different kinds of frames but having a consistent element. You can use the same color in different sizes, widths, or textures. Another option is to pick one color and buy frames of different shades, from light to dark. You can also use two contrasting colors like black and white. Try placing different mat colors to the same frames for a beautiful pop of color to a neutral wall.
Some people like to add antique and metal borders to achieve a vintage feel. By positioning the frames horizontally and vertically, it will modernize your wall and turn it into wall art.
3. Positioning Your Photos

In positioning your family pictures in your living room wall, start with the most important pieces then work your way around them.
When it comes to the proximity of frames, here are a few measurements to guide you when you display your family photographs:
- Place the majority of the photos at eye level which is around 60 inches from the center to the floor.
- Have at least three to six inches between picture frame borders to maintain a level of uniformity despite the variety.
- For larger frames, at least a six inches gap is ideal.
- If you’re hanging photos above furniture, the bottom of the frame should be about six to twelve inches from the top of the couch.
No need to be strict with measurements as long as there’s enough white space to prevent clutter and to highlight each piece.
The important part is to make sure all frames are hung straight. While positioning it, do step back every now and then to ensure that it’s aligned. Also, hang each frame using two hooks so it doesn’t move around.
Final Thoughts
Choosing how to display family photos in the living room goes beyond frames and layout. It’s about sharing your family’s story with people you invite to your home. It may be a treasured memory in one big photo or several snapshots of the moments that count.
So what is the best way to display your family pictures? It’s a combination of designs that brings out the best in your photographs. When your displayed family photos evoke joy, inspiration, and pride, it’s more than wall decor, it’s a work of art.